Wednesday, December 15, 2010

Christmas is coming...


    Excuse the  [even worse than usual] photo quality, I had to take this in the dead of night last night before I packed them up. To celebrate all the gingerbread houses I'm making this year, I made everyone I'm doing it with a little plastic canvas ornament sort of following the tutorial here . I'm reasonably happy with them but should probably point out that they take a lot longer than one might expect noting the quality of the craftsmanship that went into them/ their size. 

In other news, I said goodbye to my new little friend yesterday and am saying goodbye to her nearly-identical cousin doll tonight.  I've still got an extra set of legs though (I made Celia's twice before I was happy with the colors) so I'm considering making a third dolly, but don't really know what I would do with her. (Nephew number three was born a few days ago and there's no new niece in sight.)


Friday, December 10, 2010

Button Cookies

Delicious snack for today's non- denominational end-of-year-winter party at Sewing Club.


...Okay, so they came out of a tube and are not particularly delicious to anyone above the age of 13, but I'm sure the kidlets with love them.

Tuesday, December 7, 2010

Quilled Snowflake Part 2


8) Coil one of the two inch pieces into a tight circle, let it spring loose and glue down the end, then pinch twice to get a pinched elipse. Repeat with the other five pieces.


9) Now take two of the legs and dip the smaller, less curly ends gently in the glue. Press against the large circle so they lay opposite one another.


10) Glue the other four legs around the circle in the same manner.


 11) Now take out your little hearts. Gently glue them into the center of the curlicues between  the snowflake legs, as shown.


12) Now you're going to need to work around the circle, gluing the side of the heart to the leg piece a total of 12 times. Work one leg at a time, applying glue about half an inch up the leg on either side, then press the heart against it.


13) Now you need to take out you teardrops. Apply some glue to either edge and press it into the middle of your heart shape. If the curlicues on your heart are really far away from one another, you may need to unroll the curled bits a little to get them close enough to press together. Do this in the center of every heart.


14) Now, in the center of each snowflake leg glue your pinched elipsi. (elipsies? I have no idea.)


15) If you want, you can coat the whole thing finely in glitter glue, or use spray adhesive and powdered glitter. Then hang on a bit of monofilament or thread. You're done!


Monday, December 6, 2010

Quilled Snowflake Tutorial: Part 1


Since my ceiling is approaching saturation with this little guys, I thought I'd pay the favor forward to anyone else who might want one.

Supplies

  • Glue (something thick, like tacky glue)
  • Slotted quilling tool (or you can make do with a toothpick or needle)
  • Quilling paper, or regular printer paper cut into 1/8" strips

    1. Tear your paper into
    • 7 six inch pieces
    • 18 three inch pieces
    • 6 two inch pieces
    Tearing makes for a softer edge when you glue shapes together, and also spares me having to find my scissors.
    You may find it helpful to make a pile of 12 and 6 three inch pieces, as I did.


    2.Make your center by coiling one of the 6 inch pieces into a tight circle. Let it spring loose and then gently glue down the end. Set aside.


    3.To begin making the snowflake's legs, coil one and half times at one end of a three inch piece. Then lay the piece atop a ruler and coil from the other end until the total length is 1.5 inches. Both times coil on the same side, so the swirls face each other, like in the picture. Repeat this 11 more times so you have 12 little legs.
    4. Now pair up your legs from step three, with the coils facing away from each other as shown. Pour a tiny bit of glue into a shallow bowl and use a pin to apply dots along one inner edge of a leg: press the two pieces together to make a completed leg. Repeat 5 more times, for a total of 6 legs.
    5.Now fold each of the remaining 6 six inch pieces in half so you get a visible crease. Unfold and coil each side in to the center, as shown.
    6. When you finish on either side, you can use your fingers to gently uncoil a bit to force the shape into a more rounded heart. Repeat 5 more times, trying to get 6 uniform hearts.


    7.Coil the remaining 6 three inch pieces into circles. Let the circles spring out, glue end down, and  gently pinch one end between two fingers to form a tear drop shape.

    To be continued...

    Currently stitching


    Just like every first-week-in-December since I came to Cornell I've been working frantically
    this week in preparation for my department show. This semester's load wasn't as bad as the past few years, mostly because all my work was in half scale, but it still took a good bit of time and stress.

    Some things in half scale are much easier. It's nice not to have to worry about proper facings and hems, but they present some unique challenges: like all the fabric needs to be half as thick, half as heavy, half as drapey, and prints need to be half as large as you'd imagine on a fullscale. If I have to sew another impossible tiny double-ruffle on one more tiny waistline, I might cry.

    Still, they're kind of charming: sort of like how things that are really ugly for grownups (i.e. crocs, fingernails) become impossibly precious and charming on toddlers. Just don't study my teeny tiny seams too closely.


    Thursday, December 2, 2010

    True Sign That I'm an Enormous Dork

    One of my camp friends and I are going to see the Rockettes in 16 days 2 hours 29 minutes 54 seconds (not that I'm excited or anything.) I promised her that I'd craft us some appropriately adorable (and not at all ridiculous) Christmas headbands, so today I finished these.

    I used the pattern from Livvy Loo Who's tutorial but didn't follow the directions. Instead of buying a headband I stitched some elastic to a bit of black grosgrain until it fit my head and then hand tacked all the flowers on.

    Slightly juvenile? Maybe. Awesome? Definitely.

    Monday, November 22, 2010

    It's an Attack!


    Of seasonal felt mice!

    I started making these quite a while ago before I decided to go with the vastly superior quilled snowflakes, but now I'm rather inundated with them and am not quite sure where they should be re-homed. At least they add a bit holiday-cheer to my desk-lamp.

    Happy thanksgiving!


    Saturday, November 20, 2010

    Sewing Club Takes on Social Justice


    As a non-denominational-winter-giving-celebration, Sewing club is making pillowcases for Conkerr Cancer. I hope that in the spring we can make a project Linus quilt, but these pillowcases are a really great project for now since we're slightly pressed for time. The construction is really fairly simple, and I think two meetings should be enough time for everyone to make at least one. It was the most fun fabric shopping ever-- I bought a lot of really cool red-tag quilters stuff from Jo-Anns in fun prints I almost never get to use otherwise.

    Thursday, November 18, 2010

    Christmas Crafting


    I finished my first legit Christmas gift yesterday, at the expense of some much more important activites (i.e. my homework.) Her name is for Celia and she's for a friend who likes dolls. Or possibly I'll find something else to do with her, I can't quite make up her mind. The pattern is mostly from the book Wee Wonderfuls, which I impulse bought on Amazon and am not entirely impressed with, but I am really happy with this doll.


    I'm also making a couple of quilled snowflake ornaments in addition to my usual felt ones. I think they look quite elegant, but they take a somewhat ridiculous amount of time, and have resulted in my floor being coated in a fine layer of paper strips and glitter. Also, I possibly have some spray adhesive on my sheets, but these are the perils of dorm crafting I suppose.


    As a counter-measure for the Christmas cheer, I'll leave you with the slightly disturbing creature that looked up at me from my bookshelf untill I gave her limbs yesterday.


    Peace out, girl scout!

    Sunday, November 14, 2010

    How I Got Into Teach For America

    I promised myself that if I was accepted into Teach for America that I would write an entry and publish it somewhere in the blogosphere detailing how I had done it. I felt that I owed it to applicants who came after me, because I spent an absolutely ridiculous amount of time googling phrases like "How I got Into TFA" or "TFA Acceptance" or "Secret to TFA." Every time I found a blog post with that title, of course, I was disappointed. Nothing gave me any new information, and I ended up feeling more lost than when I'd started, mostly because of the time wasted.

    But here's the thing. I know you, prospective applicant heck-bent on addressing educational inequality in this country, don't want to hear this. I know everyone says it, but it's true: you already know everything you need to get in. I got in by displaying some combination of the following traits, as listed on TeachForAmerica.org:
    • Demonstrated past leadership and achievement: achieving ambitious, measurable results in academic, professional, extracurricular, or volunteer settings
    • Perseverance and sustained focus in the face of challenges
    • Strong critical thinking skills: making accurate linkages between cause and effect and generating relevant solutions to problems
    • Superior organizational ability: planning well, meeting deadlines, and working efficiently
    • Respect for individuals’ diverse experiences and effectively working with people from a variety of backgrounds
    • Superior interpersonal skills to motivate and lead others
    • Thorough understanding of and desire to work relentlessly in pursuit of our vision
    The only remotely helpful thing I did in my preparation was to go through this list and jot down ways I exemplified these qualities,but when I got down to it I forgot all of them and don't think I covered half of the points I had hit in my interview practicing. But something went right somewhere, somehow, and if it's meant to be for you it will go right too.

    But just so I don't end on that vague abstraction, I will tell you some things that probably(maybe) helped me. I had one or two leadership positions, but nothing ridiculous. I founded Sewing Club and kept it running for three years, I worked as Arts Director at a teeny Girl Scout camp and helped expand the program there, I designed some costumes for my old high school theater department, I was a member of a design league, and I work at a costume shop at school.

    I know how nerve-wracking it is: I know how bad you want to do it and how scary the whole process is, but in the end no amount of googling is going to help you... and if any prospectives are actually reading this, the best advice I can give you is just to stop googling.

    The Start of my Relentless Pursuit


    This time next year I'll be in the trenches, working to level the appalling achievement gap in this country! Specifically, I'll be teaching elementary school in Chicago. Which when you get right down to it is not all that specific, and could end up being anything from K-8, but it's as good as I'm getting for now and it's all that I wanted.

    Tuesday, November 2, 2010

    Little Hands, Relatively Small Open Flame


    I haven't been writing much (obviously) but I've decided to rectify that. Since I'm back at Cornell, I've started up Sewing Club again, which leaves me bursting full of cool kid crafting that I ought to be recording.

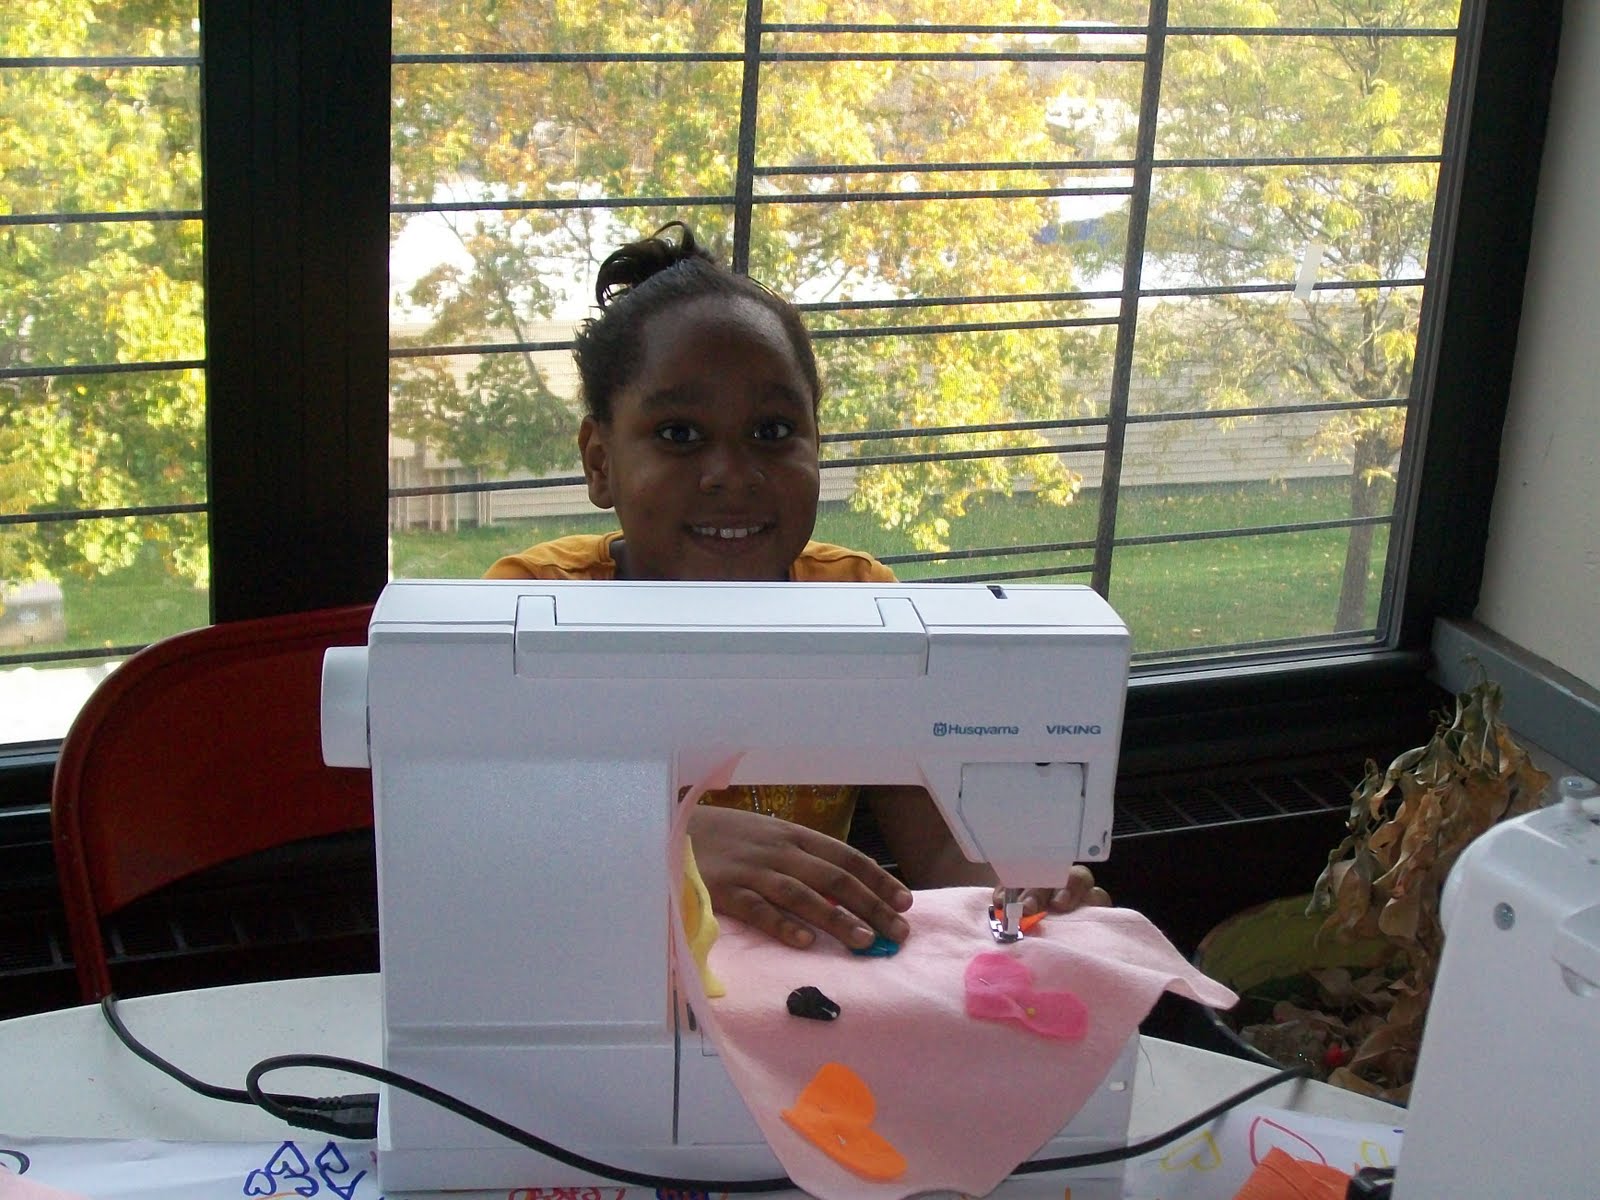
    Sewing Club is my little Ithaca attempt to level the achievement gap. Once a week I walk up to a local low income apartment housing complex, toting a heavy bag full of fabric and markers and patterns, and teach a small group of girls and boys ages 8-14 basic sewing skills. I've made a lot of really cool progress with my kids over the time I've been there, and since this is my last year there I'm really trying to go out with a bang, mostly by trying to make our time together as exciting and multidisciplinary as possible.

    In an attempt to make this cool and awesome lasting impact, last week I brought in my first ever Sewing Club science experiment, and it went really well. Or, it went really well in terms of the kids liked it and were able to complete the mini lab I had set up, but not really well in terms of the kerfuffle I caused. See, I br
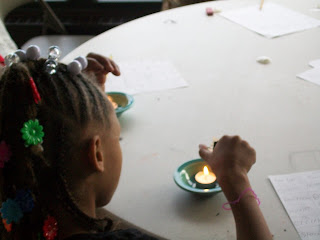
ought a really simple but awesome fiber science experiment: we took different types of fiber (cotton, polyester, wool, silk, acrylic and some kevlar and steel a professor gave me) and burned them in a tiny tea light, and made notes of the different effect the flame had on each of them. The kids L-O-V-E-D it, and only one teensy burn was sustained. They were even able to identify the tricky mystery fiber I brought! (cotton poly blend.)


    Only one bitty issue. I had checked with the program director who said it was fine to do the experiement, but I guess she didn't check her higherups, and apparently (this was news to me) we are under constant video surveillance! Anyway, the people who review the tape called my supervisor in to say open flame was a no-no, and I turned six shades of red when she told me... but its over now, and the kids had a great time.